


Etchspace Salvage is a repeatable evacuation-style permanent exploration gameplay set in the Aberrant Zones. Players need to collect supplies, complete commissions, and defeat enemies under the restriction of Derangement—Derangement will continuously increase with time, combat, and collection actions, and players will be forced to evacuate when it is full. By accumulating Operation Metrics, you can exchange for various tiered rewards such as gacha resources, cultivation materials, and T-Creds (T-Creds).
This comprehensive guide walks you through everything you need to know about Etchspace Salvage in Arknights: Endfield. It covers all key details from basic rules and unlock requirements to efficient farming routes, optimal Support Tech upgrades, resource priorities, and full reward breakdowns, so you can master this mode and earn every available reward with ease.
Version Update Content
Version 1.1
- Beijing Time, March 12, 2026
- Unlock Aberrant Zone 4
- Unlock Condition: Authority Level ≥ 40 + Complete the Key Commissions of Aberrant Zone 3
Version 1.2
- Beijing Time, April 17, 2026
- Unlock Aberrant Zones 5 & 6
- Unlock Condition: Authority Level ≥ 45 + Complete the Key Commissions of the previous Aberrant Zone
Unlock Conditions
- Reach Authority Level 25
- Complete Main Story Chapter 1 – Process 3
- Complete the priority Etchspace Salvage Tutorial Mission (Interact with the portal with Aquito on the "Dijiang" to learn gameplay mechanics)
Standard Gameplay Process
1. Accept Commissions
- Prioritize completing Key Commissions to unlock new areas and storylines
- Select Focus Commissions, which are weekly high-metric reward missions
- Use Aurylene Crystals to refresh/add commissions (up to 4 active at the same time)
2. Efficient Exploration
- Prioritize unlocking Ziplines and Ropes to build fast-moving routes
- Collect Precipitation Crystals to obtain Nodules and Aurylene Crystals
- Only open the supply points required to complete commissions to reduce Derangement growth
- Collect scattered treasure chests on the map to obtain Oroberyl
3. Unlock Permanent Support Tech
Complete Exploration Commissions to unlock permanently effective buffs
4. Evacuation and Settlement
Evacuate before Derangement is full, and rewards will be automatically settled (no need to clear the entire map)
5. Claim Rewards and Repeat
Submit commissions, claim Operation Metrics tiered rewards, and re-enter the dungeon to start resource farming
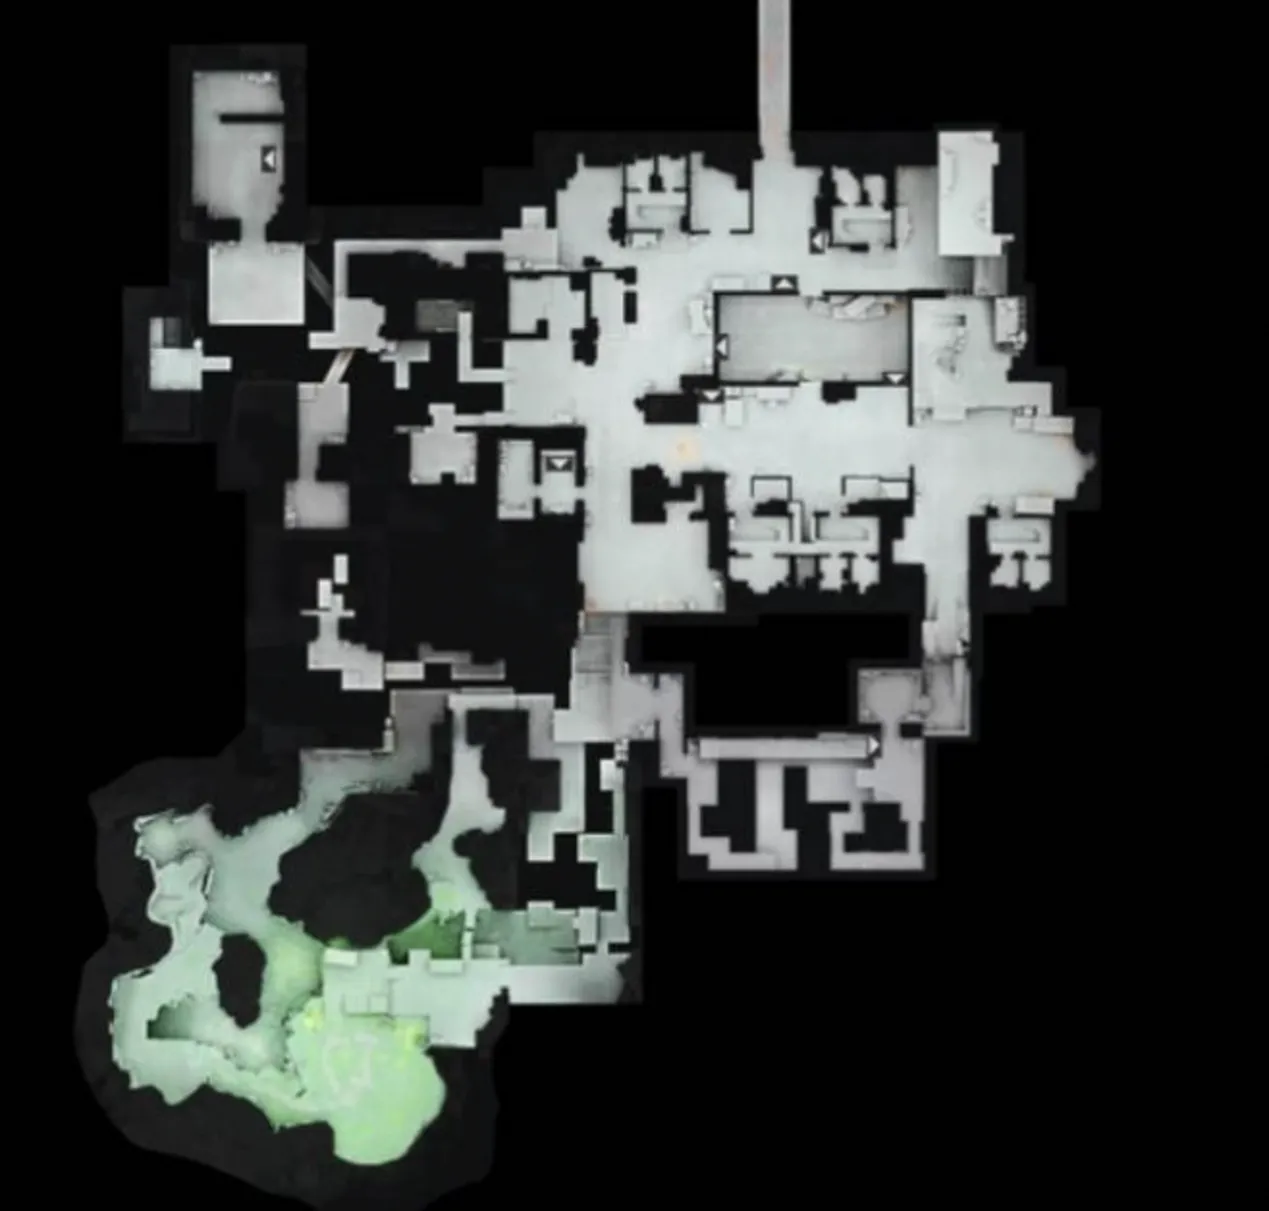
Regional Shortcuts and Efficient Resource Farming Routes
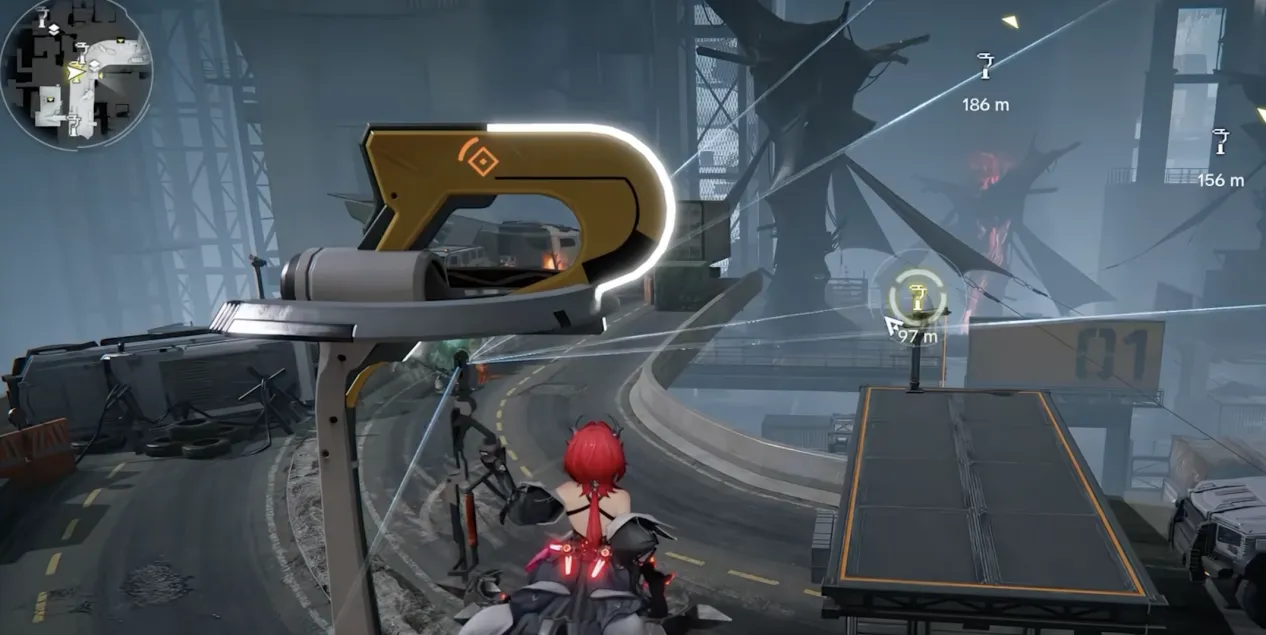
Key Routes & Efficient Farming in Aberrant Zone 1
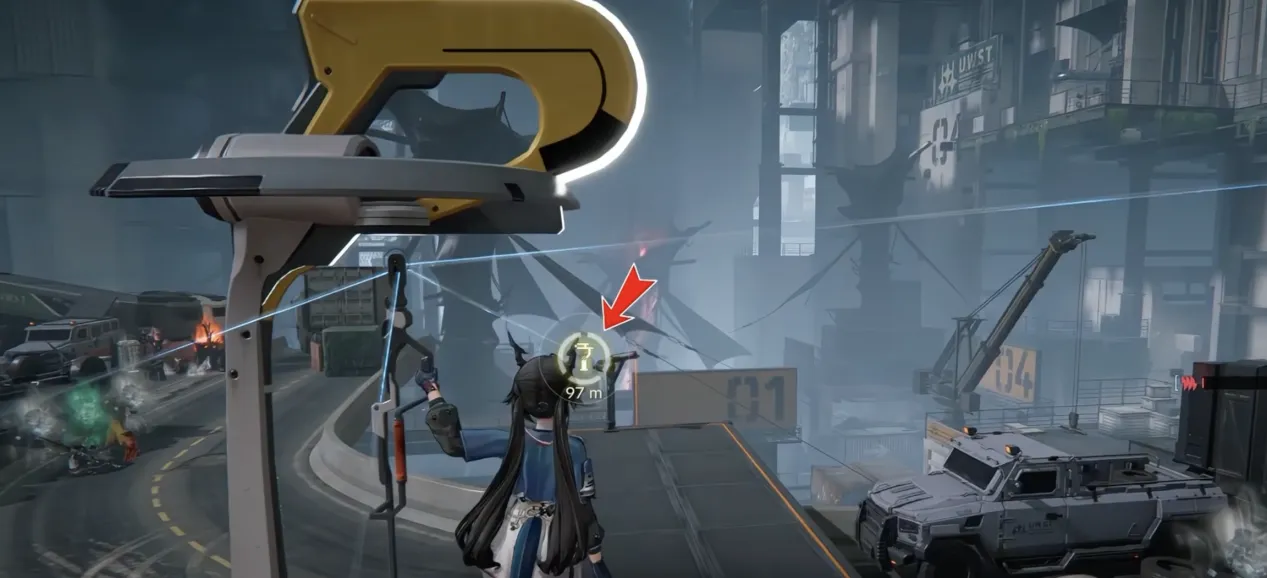
1. After entering the instance, climb the left rope to the bridge and go to the zip line opposite.
2. To unlock the 97m zip line, jump right from it to the Zone 1 boss area. Open the left door, take the right stairs to the roof, and interact to unlock it.
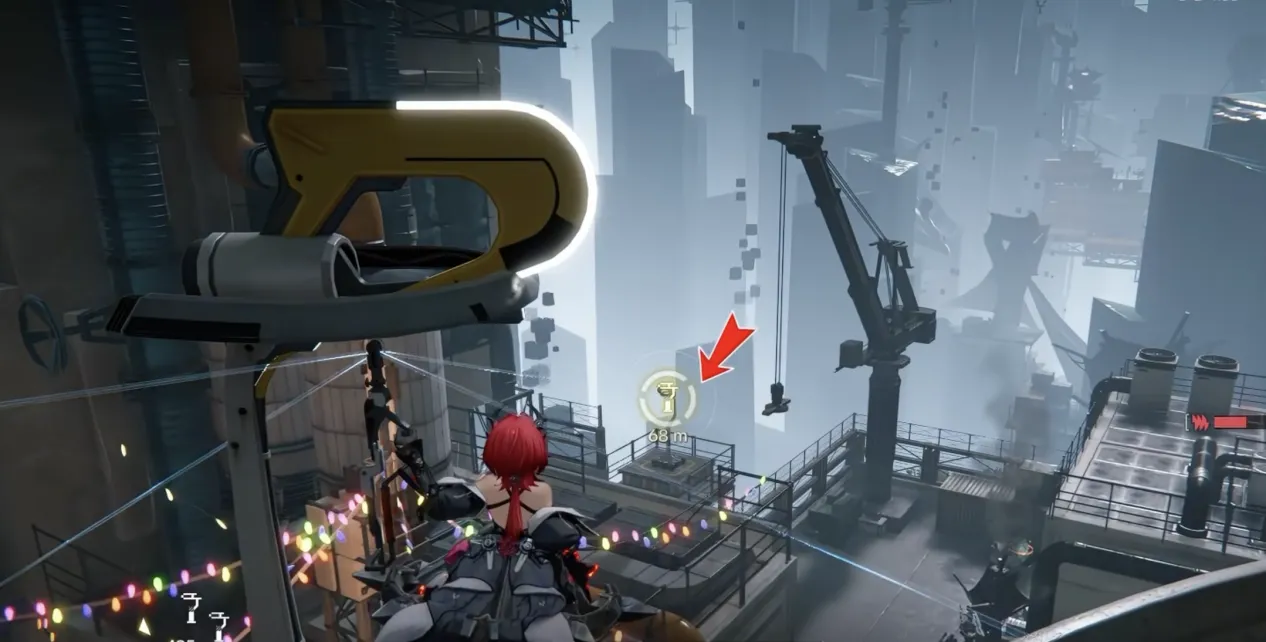
3. From the bridge, take the 97m zip line. Stay on it and turn to the 100m zip line below right. Unlock it by exiting the gate, turning right twice, climbing down the rope, and interacting with the yellow light.
4. After reaching the end, get off the zip line, go right, defeat two elite enemies, and enter the small room at the end to get the green tubercle chest and vending machine.
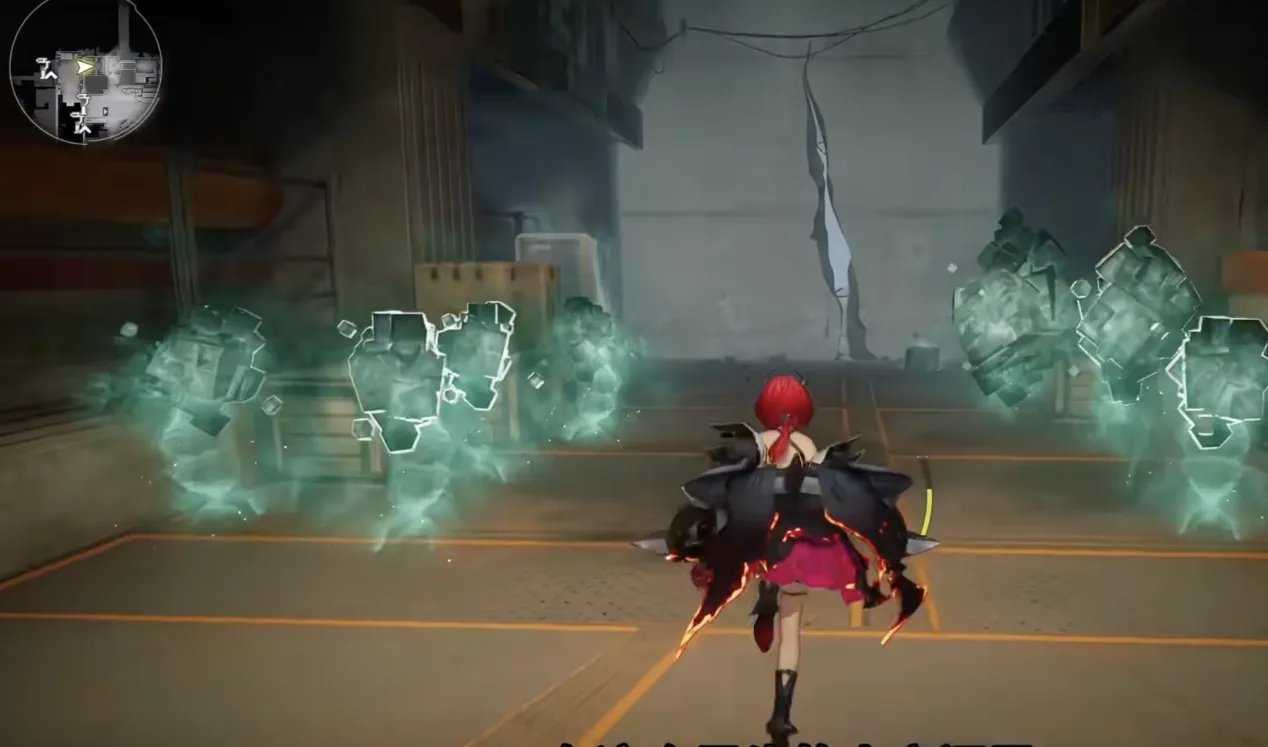
5. After looting, jump back to the boss area, defeat the boss, clear remaining enemies, and finish the full run.
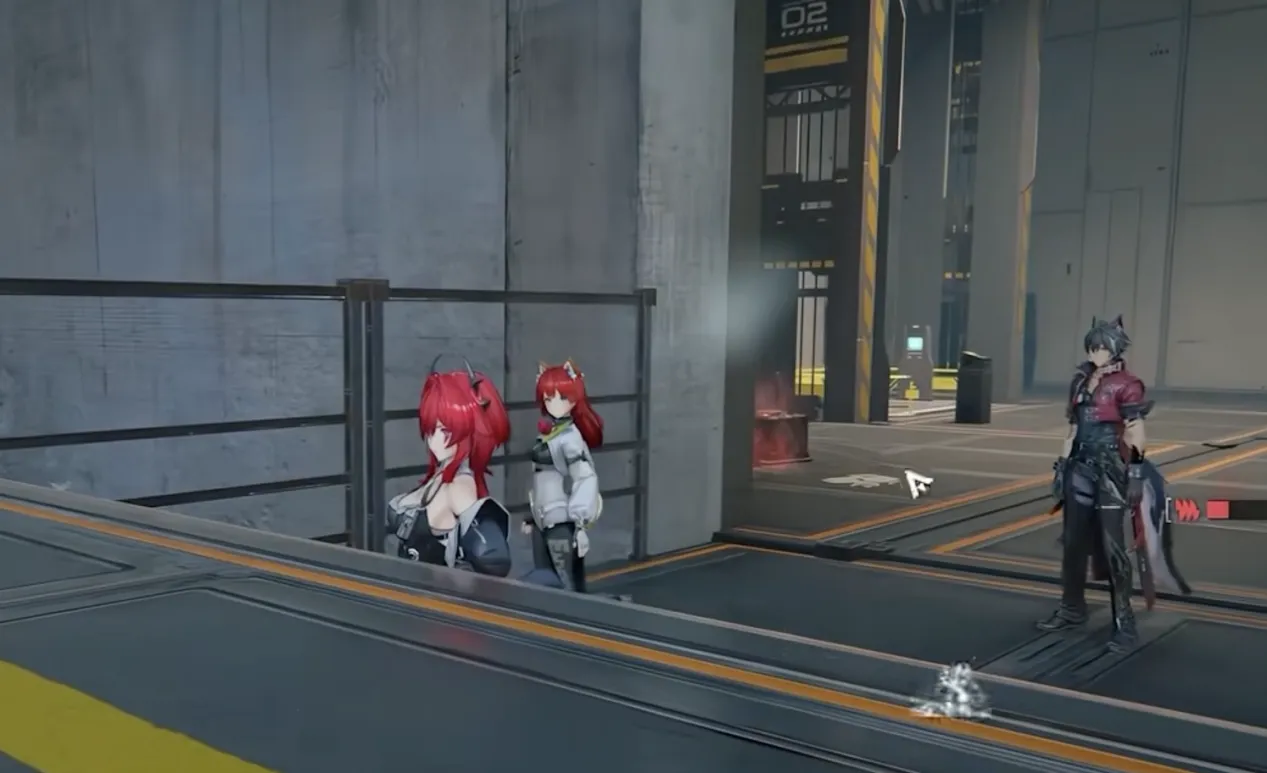
Key Routes & Efficient Farming in Aberrant Zone 2
1. Defeat the Boss of Aberrant Zone 2 → Take the elevator to the platform → Move right to unlock the cross-region Zipline
2. Behind the shelves in the Boss area, an Orange Nodule Shutter Box and Auto-Vendor spawn stably (must be opened on the first exploration)
Axebeast Fast Farming Route in Aberrant Zone 3
1. Start from Aberrant Zone 2 → Cross the bridge → Board the initial Zipline
2. Turn the camera 90° to the left → Take the 54m Zipline (needs to be unlocked on the first pass)
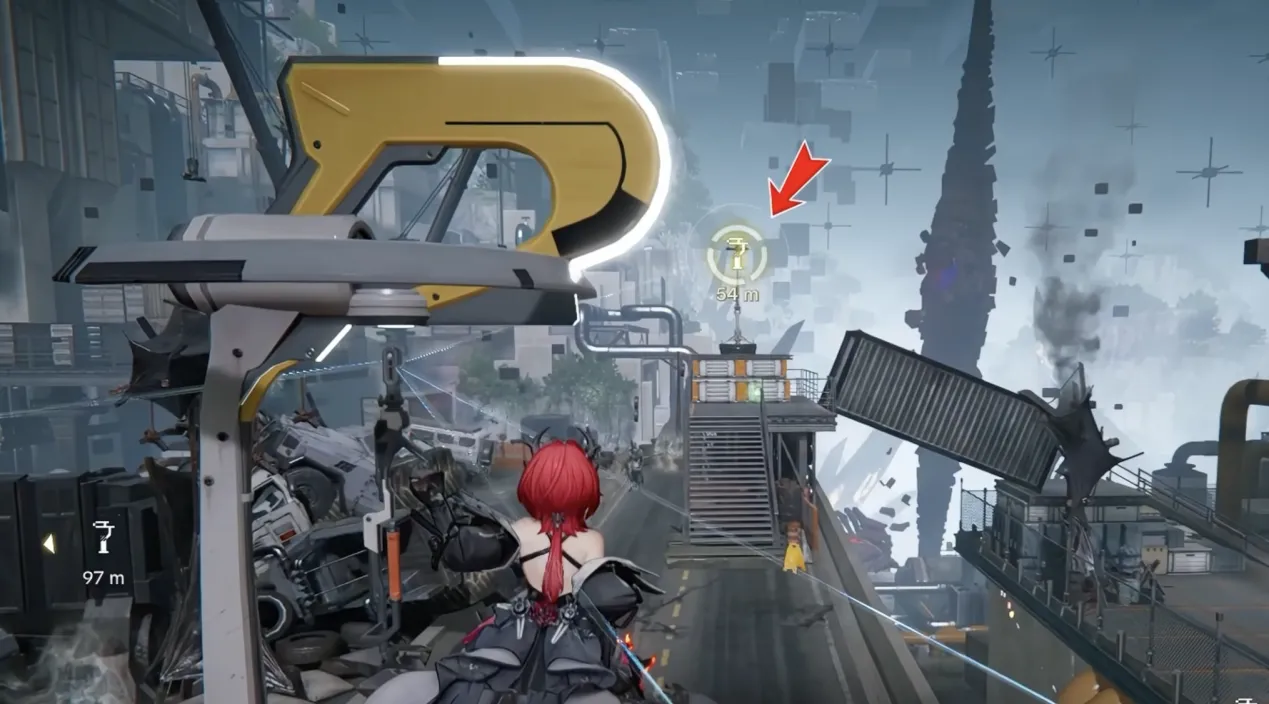
3. After landing → Take the 190m Long Zipline directly to the platform where the Axebeast is located
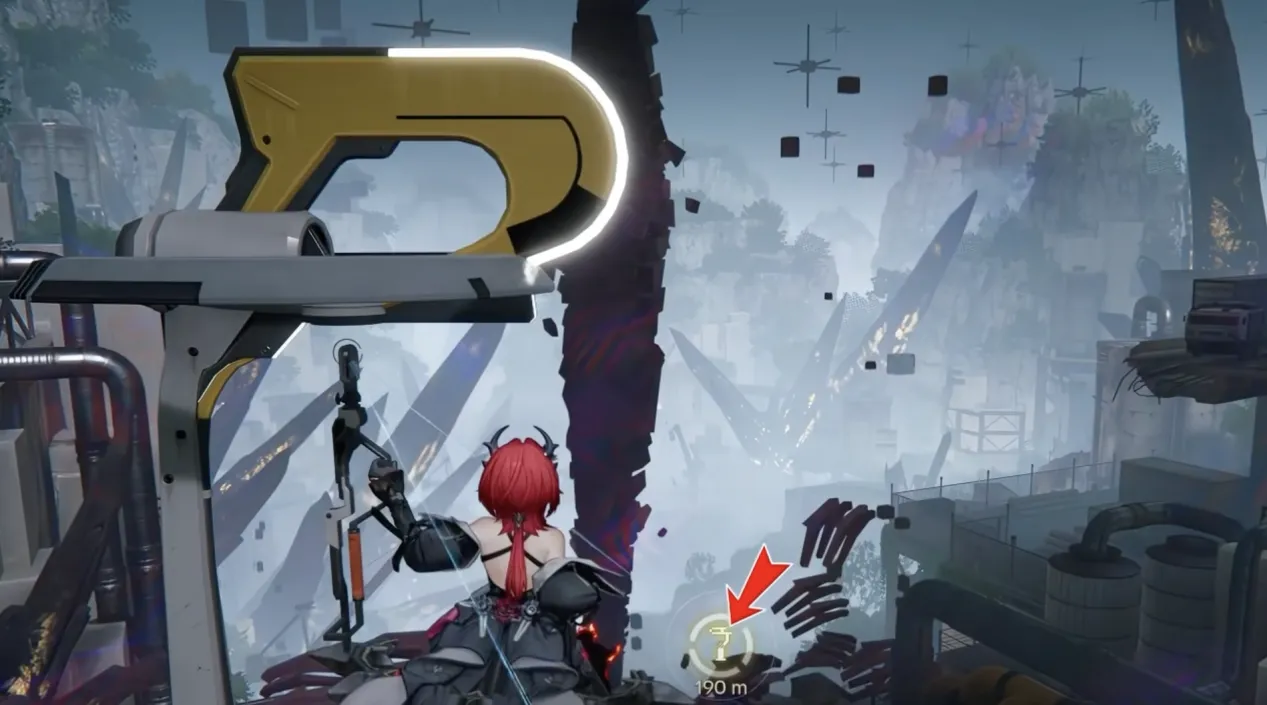
4. Jump down from the platform and directly challenge the Axebeast
5. After defeating the Axebeast, loot the nearby Red Nodule Shutter Box and Auto-Vendor to obtain a large number of Enigmatic Gold Bars and rare materials
6. Evacuate immediately to achieve high-yield resource farming in a short time
Key Routes & Efficient Farming in Aberrant Zone 4
1. Take the elevator, get the key, go up to the platform, then head west (left) to check the zipline (leads to the highway above the spawn point for round trips).
2. Turn east (right), go straight along the front-left path, defeat the guarding enemy to get the key and trigger the cutscene.
3. After the cutscene, head south (bottom), take the front-left zipline down. Land, go north (top), clear tent guards (use explosive barrels for ease), get the tent key and trigger the cutscene.
4. Head east (right) again, circle through containers to pick up the key and watch the cutscene.
5. Go north (top), take the elevator to the first floor, follow the mission tracker, get the key near the administrator and trigger the cutscene.
6. Head northwest, go up the stairs, follow the tracker, defeat guards with explosive barrels, get the key and trigger the cutscene.
7. Go to the northwest corner (top-left), take the elevator up one floor, move north (top), use explosives to detonate the front-left Erosion Core.
8. Clear spawned enemies, collect boss materials, finish the area scan via the tracker, then extract.
Key Routes & Efficient Farming in Aberrant Zone 5
*Note: Opening the backpack won’t increase pollution; bring explosives for resources and combat.
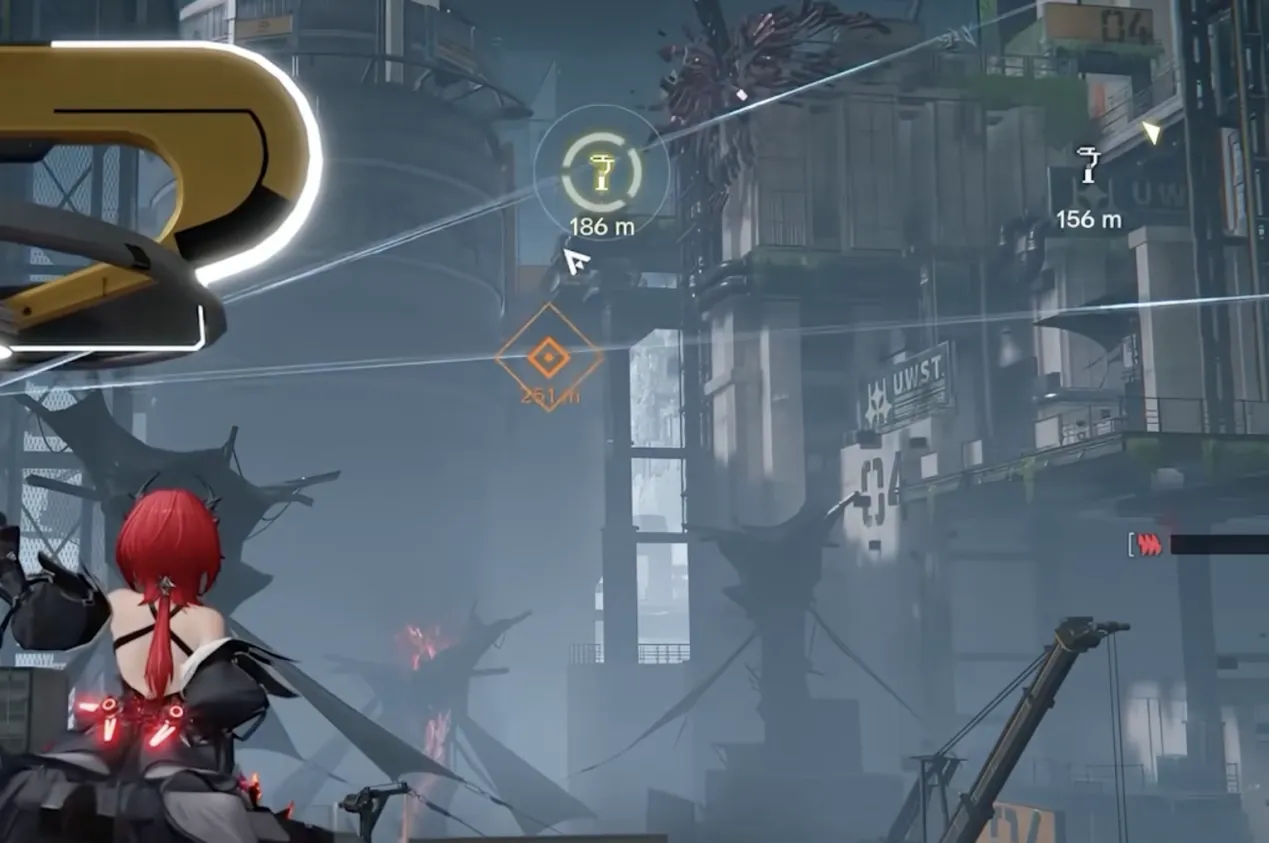
1. Go north to take the zipline, activate the flower lock frame westward, then take the 186m zipline eastward (unlock via Chest 4 first), and follow the mission tracker to clear monsters and enter the door after the cutscene.
2. Jump through the north and west platforms, go up the spiral staircase to get the first key; then open the lock eastward, jump over the northwest platform, trigger the mechanism to get the second key, and take the elevator northward to get the third key near the administrator.
3. Activate the east mechanism and zipline, jump through the north and west platforms, avoid monsters, and get the fourth key on the southwest bridge; then activate the south mechanism, jump through the platforms and jump down from the box.
4. Clear the northeast guarding monsters to get the fifth key, go north to take the west elevator up one floor, open the south yellow lock to get the sixth key, then challenge the final boss and collect its dropped materials.
5. Use explosives to destroy nearby mines to collect maximum resources before extracting; follow the mission tracker after extraction.
Key Routes & Efficient Farming in Aberrant Zone 6
Tip: Complete the main quest of Echoes of the Aberrant, then head straight to Zone 6 to fight the boss. Turn on the flame switch in advance; the boss will be instantly killed by the flamethrowers when it jumps onto the platform. Turn off the fire, collect the rewards and gold nuggets, and you can max out the gauge in about 20 minutes. Important tip: Remember to turn the flames back on after collecting rewards for easy repeated farming.

1. Go north to use the lock, head west to take the zipline rack, then go east to cross the 97m zipline (unlocked in the previous run). Proceed northeast to the elevator, go up to the first floor, then take the east zipline unlocked in Exploration Plan 5 and follow the mission tracker across the broken bridge.
2. After the cutscene, go south to find the 209m zipline near the spawn point for emergency re-entry if forced out. Head northwest to take another elevator to the first floor, then go north along the path to reach a second elevator and descend further.
3. Follow the mission tracker to fight the boss, collect its materials after defeating it, and proceed with the interaction to finish the cutscene.
4. Go northwest and climb three flights of stairs, then head southeast to activate the mechanism that will burn the boss if it re-approaches.
5. Use excess Disorder to mine the minerals under the stairs, gather all loots, then extract immediately to complete the mission.
*Note: Ensure you have completed Resistance 2 and Stability 9 first; the boss has extremely high HP and may force you out with insufficient damage.
Precipitation Crystals Farming Priority
- Prioritize dense Precipitation Crystal clusters near Ziplines
- Use Industrial Explosives to quickly clear crystals and obstacles, reducing Derangement growth
Support Tech (Permanent Buffs) Upgrade Order
|
Support Tech |
Effect |
Maximum Value |
Priority |
|
Derangement Tolerance |
Reduces Derangement growth rate |
20% |
1 (Highest) |
|
Stable Protocols |
Increases Derangement upper limit |
4200 |
2 |
|
Nodule Refining |
Increases Aurylene Crystals output |
150% |
3 |
|
Container Expansion |
Increases backpack capacity |
50 Slots |
4 |
|
Tactical Tempo |
Restores Skill Points (SP) after defeating enemies |
100 SP |
5 |
|
Fragmented Treatment |
Restores the maximum HP of the ally with the lowest HP after defeating enemies |
20% Max HP |
6 |
|
Armor Gilding |
Increases allies' maximum HP |
+30% |
7 |
|
Portable Explosives |
Increases Industrial Explosives carrying capacity |
50 Pieces |
8 |
|
Charge Burst |
The first combat skill released by the team after entering combat deals additional damage |
200% |
9 |
Resource and Loot Priority Table
|
Resource Type |
Priority |
Core Usage |
|
Red Nodule Shutter Box |
Highest |
A large number of Gold Statues and high-tier cultivation materials |
|
Orange Nodule Shutter Box |
High |
Mid-tier materials and commission submission items |
|
Precipitation Crystals (Nodules) |
High |
Craft Aurylene Crystals and obtain Operation Metrics |
|
Elite Enemy/Boss Drops |
High |
Rare materials and a large number of Nodules |
|
Instrument Safes |
High |
Gold Statues (key commission submission items) |
|
Auto-Vendors |
Medium |
Specimens (commission submission items) |
|
Normal Treasure Chests/Packages |
Medium |
Oroberyl, basic materials, and confidential items |
Operation Metrics Tiered Rewards
|
Operation Metrics Milestone |
Reward Content |
|
50 |
Oroberyl ×400, Advanced Combat Records ×10, T-Creds ×10,000 |
|
300 |
Basic HH Permit ×2, Weapon Inspection Kit ×10, T-Creds ×10,000 |
|
1,200 |
Oroberyl ×400, Origin Crystal Prism ×50, T-Creds ×10,000 |
|
2,500 |
Basic HH Permit ×2, Origin Crystal Disk ×25, T-Creds ×10,000 |
|
5,000 |
Oroberyl ×400, Mold ×30, T-Creds ×10,000 |
|
10,000 |
Basic HH Permit ×2, Advanced Cognitive Carrier ×6, T-Creds ×10,000 |
|
20,000 |
Oroberyl ×400, Weapon Inspection Kit ×15, T-Creds ×10,000 |
|
30,000 |
Basic HH Permit ×2, Origin Crystal Facet ×15, T-Creds ×10,000 |
|
40,000 |
Oroberyl ×400, Origin Crystal Set ×12, T-Creds ×10,000 |
|
50,000 |
Basic HH Permit ×2, Heavy Mold ×12, T-Creds ×10,000 |
|
60,000 |
Oroberyl ×400, Advanced Cognitive Carrier ×12, T-Creds ×15,000 |
|
70,000 |
Basic HH Permit ×2, Weapon Inspection Kit ×20, T-Creds ×15,000 |
|
80,000 |
Oroberyl ×400, Origin Crystal Facet ×20, T-Creds ×15,000 |
|
90,000 |
Basic HH Permit ×2, Origin Crystal Set ×16, T-Creds ×15,000 |
|
100,000 |
Oroberyl ×400, Heavy Mold ×16, T-Creds ×15,000 |
Conclusion
The optimal gameplay strategy for Etchspace Salvage: Unlock shortcuts first → Target high-value loot → Avoid ineffective combat → Evacuate as early as possible → Repeat the commission cycle.
Advice for new players: Prioritize unlocking all Ziplines and Ropes, focus on farming Axebeast-related resources in Aberrant Zone 3, open high-tier Shutter Boxes, and accumulate Aurylene Crystals. This not only allows you to quickly advance the progress of Key Commissions and maximize Operation Metrics gain, but also efficiently farm endgame cultivation resources and gacha items.


 TOP UP WITH DISCOUNT NOW
Alessia Müller Experienced Game Editor
Greetings, adventurers. I am Alessia, and I have been covering the action-RPG genre for ten years. I am absolutely passionate about epic worlds and endgame challenges, but I’m also a meta specialist. Whether it’s Diablo IV, Path of Exile, or Honkai: Star Rail—I test endgame builds in live sessions, analyze skill tree optimizations, item rarity mechanics, elemental combos, and party compositions. My goal: less frustrating farming, more meaningful progress—with clear, tested tips that help you in-game right away.
