


Hello Travelers! The latest Stygian Onslaught in“Luna V” is live from March 4 to April 7, 2026.
In this guide, we’ll cover boss mechanics, elemental reactions, and the most effective team strategies to help you overcome every stage of the Stygian Onslaught and claim all the rewards with ease! If you haven’t jumped in yet, take a look at the recommended setups and tips for a smooth full clear.
Basic Rules
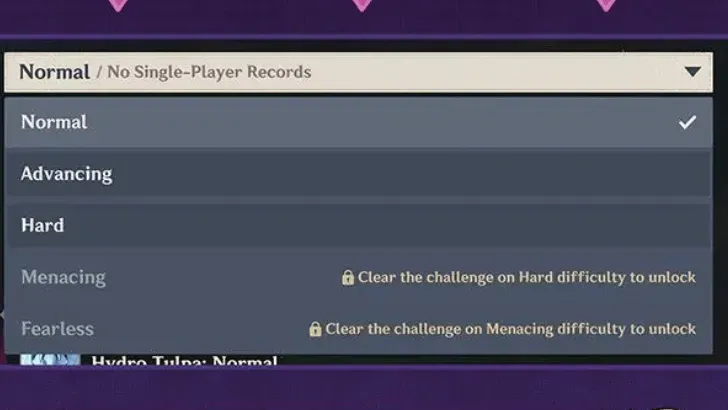
This game mode is already live in the current update and features six difficulty levels. Each run requires defeating three consecutive bosses, and starting from Difficulty Level IV, you’ll need to form three non-overlapping teams to take on the challenge.
Teams & Time Limit:
- Levels 1~3 Each Boss 10min. You can use a character more than once, and you can Co-Op by Matching.
- Levels 4~5 Each Boss 120s. You cannot use a character more than once.
- Level 6 Each Boss 120s. If total time is below 180s, you get a better reward.

Dust of Enlightenment can be used to re-roll artifact substats so that you can turn a mediocre artifact into a good one. You can also choose which substats you want to prioritize before re-rolling.
Artifact Rewards: You can choose an Artifact Domain and claim rewards from it via the following methods:
- After completing Level 3 or above, use Resin to claim reward once.
- Every phase there is a 10 day Burst Period, when you can spend an extra 20/40/60 Resin to claim 1/2/3 rewards.
Once the Disturbance Outbreak State ends, you can no longer collect artifact rewards after completing a Battlefield challenge, but can still play the rest of Stygian Onslaught as usual until the event ends.
Difficulty Summary
For those seeking Primogems, clearing the D3 is straightforward, as enemies cap at Level 90 with no enhanced mechanics. Fractured D4 increases the challenge but allows Co-Op mode; if you cannot clear it solo, you can call for backup from experienced players to secure victory. Since the rewards include Dust of Enlightenment, it's worth pursuing. Fractured D5 offers the same rewards as Level IV but is solo-only, pitting you against Level 105 bosses with enhanced mechanics. However, if you aim to obtain the Weapon Skins, prepare for a significant challenge!
Simply put:
D3: Open world level difficulty and coop; timer 10 min, able to get all gems. Basic (co-op friendly)
D4: 11-1 abyss difficulty. Enhanced shields/immunities.
D5: 12-3 abyss difficulty or slight higher. Full gimmicks (solo).
D6: even whales would struggle. Massive HP (10M+ per boss), 120s timers per boss.
D6 Rewards: Weapon Skins
Clearing the challenge rewards a full set of limited-time Weapon Skins, applicable to all weapon types and all elemental visual effects. You can individually enable/disable these skins per character. Completing the stage within 180 seconds upgrades the skins to 5-Star quality, granting them enhanced visual effects.
*Note: These skins purely alter appearance and provide no stat bonuses or gameplay advantages, functioning similarly to Character Outfits.
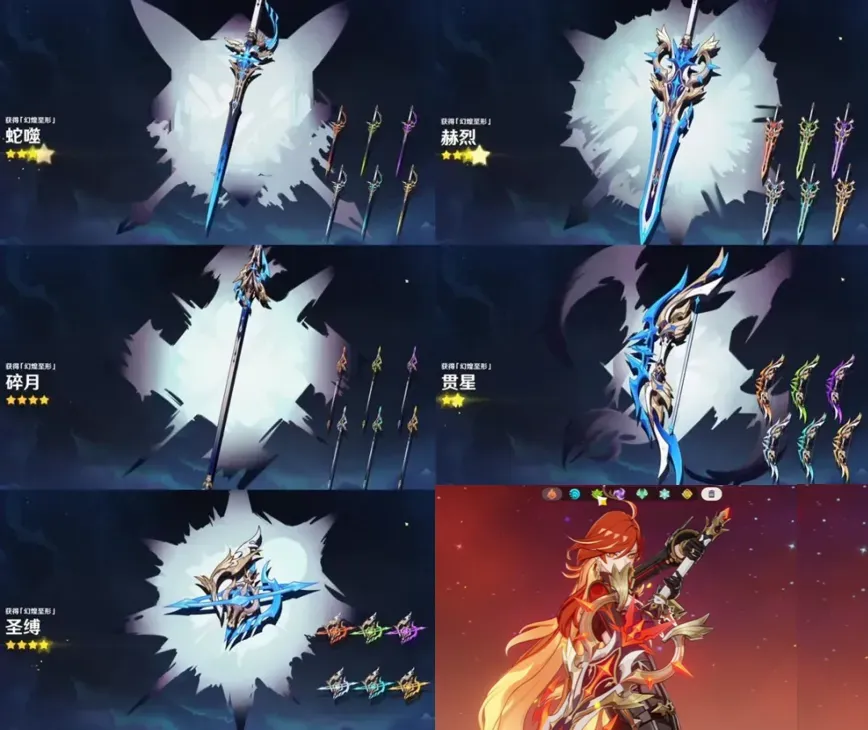
For example. Observe how the recolored "The Unforged" greatsword perfectly complements Marvuika's aesthetic! This harmonious pairing is truly visually stunning
Recommend Comps
Let's be honest: D6 poses a significant challenge. It requires three fully independent teams (no shared characters) capable of defeating bosses each possessing over ten million HP. This demands considerable investment, placing it firmly within reach of dedicated players with well-developed rosters.
Below are our recommended team compositions and key Constellations to help you claim the radiant Weapon Skins!
|
Battlefield 1 |
Battlefield 2 |
Battlefield 3 |
|
|
|
|
|
Hexadecatonic Mandragora |
Knuckle Duckle |
Secret Source Automaton: Overseer Device |


For Chamber 1
Mechanics:
The Hexadecatonic Battle-Hardened Mandragora begins the fight in its "Activated Aggregation" state. In this mode, it gains a massive +300% All RES buff, making it nearly impervious to damage. To break this defense, you must deplete its energy gauge (located below the HP bar) using sustained Electro or Pyro damage.
The Splitting Phase
Once the energy bar is drained, the Mandragora will split into 10 small spores.
- Each spore accounts for 10% of the boss's total HP and possesses no special resistances.
- You have 22 seconds to eliminate as many spores as possible before the boss re-aggregates.
- If you destroy at least 8 spores, the boss reforms with 135% Dendro RES, a massive -40% Anemo RES vulnerability, and 10% RES to all other elements.
- If you manage to wipe out all 10 spores, the boss will re-aggregate immediately without waiting for the timer.
Bring characters like Kazuha, Venti, or Sucrose to group enemies together.


Recommended Team Compositions:
|
D6 Recommended Teams |
|||
|
Mavuika |
Bennett |
Xilonen |
Kaedehara Kazuha |
|
Venti |
Durin |
Bennett |
Faruzan |
|
Varka |
Sucrose |
Bennett |
Durin |
|
Flins |
Ineffa |
Columbina |
Sucrose |
|
Varesa |
Iansan |
Furina |
Venti |


Watch your reactions! While both Electro and Pyro are effective at draining the initial shield, avoid combining them. Triggering Overload will blast the spores apart, scattering them across the arena and wasting your precious 22-second window.
For Chamber 2
Mechanics:
Unlike its previous iterations in the Spiral Abyss or Imaginarium Theater, this version of the Knuckle Duckle has undergone several mechanical reworks and is no longer strictly exclusive to Lunar-Charged teams!
Upon entering combat, the Knuckle Duckle deploys a powerful shield and summons 5 Stamping Devices. Each Device possesses HP equivalent to 25% of the boss's health and a base 10% All RES. Notably, they take 150% increased damage from Electro-Charged reactions. You can destroy these gadgets through raw damage or by triggering exactly 20 instances of Electro-Charged damage to eliminate them instantly.
Once all 5 Devices are destroyed, the boss's shield will shatter, and it will enter a paralyzed state for 12 seconds. During this window, the boss suffers a massive -50% All RES penalty. This is your primary window to unleash your Bursts. After getting back up, the boss will have -50% Electro RES and 10% RES to all other elements.
After 45 seconds in its recovered state, the boss will refresh its shield and restart the cycle.
Recommended Team Compositions:
|
D6 Recommended Teams |
|||
|
Flins |
Fischl |
Aino |
Sucrose |
|
Neuvillette |
Furina |
Ineffa |
Xilonen |
|
Skirk |
Escoffier |
Furina |
Dahlia |
|
Mavuika |
Xilonen |
Bennett |
Citlali |


For Chamber 3
Mechanics:
Upon entering combat, the Overseer Device immediately grants itself a massive +270% All RES buff. It continuously accumulates energy (tracked via the circular gauge next to its HP bar), which progressively increases the damage it deals to your active character.
Use high-frequency Cryo attacks to deplete its energy gauge.
Once the gauge is emptied, the boss’s enhanced state is dispelled, it generates 36 Energy for your party, and its resistances drop significantly: -30% Cryo RES and 30% RES for all other elements.
If the boss detects a character remaining in the Nightsoul’s Blessing state for several seconds, it will enter its Overcharged Form. In this form, the boss’s attack modules switch to homing/tracking types, making them much harder to dodge. Its All RES will shift to 110%. Much like its standard buffed state, you can still force the boss out of its Overcharged Form by applying consistent Cryo damage.
Recommended Team Compositions:
To keep the boss's energy gauge in check, we recommend a Main DPS + Buffer + Two Off-field Cryo Appliers.
|
D6 Recommended Teams |
|||
|
Neuvillette |
Furina |
Escoffier |
Citlali |
|
Skirk |
Escoffier |
Furina |
Dahlia |
|
Chasca |
Bennett |
Citlali |
 |
|
Wriothesley |
Escoffier |
Furina |
Yelan |


Conclusion
If you can’t beat "Dire" immediately, don't sweat it! Focus on clearing "Fearless" solo to get those top-tier rewards, and use the first 10 days to burn your Resin for maximum artifact efficiency.
And if you find your roster lacking the firepower needed for these independent teams, or if you want to pull for key units like Varka to gain an edge, remember that LDShop is your trusted partner for safe, affordable, and instant Genesis Crystals.
Good luck, Travelers—may your clears be swift and your rewards plentiful!


 TOP UP WITH DISCOUNT NOW
Sakura Experienced Game Editor
"Beep! Your subscription to hardcore gaming strategist 'Sakura' is now active! In this realm of fantasy and adventure, I navigate the vast landscapes of Genshin Impact, traverse the cosmic odyssey of Honkai: Star Rail, and brave the post-apocalyptic ruins of Zenless Zone Zero – uncovering hidden secrets and unlocking epic quests. As a veteran player-editor hybrid, I dissect everything from character skill synergies and tactical battle layouts to efficient resource farming and optimal team compositions. My mission? To deliver razor-sharp, comprehensive guides that empower players to dominate colossal bosses, crack intricate puzzles, and glide through gaming challenges with style. Ready to level up? Let’s rewrite the rules of victory together!
